Homework Hub logo

Serving Grades Pre-K Through College And Beyond

,
This is a placeholder for the Yext Knolwedge Tags. This message will not appear on the live site, but only within the editor. The Yext Knowledge Tags are successfully installed and will be added to the website.

ZOOM Online

  HwH ZOOM Online

30+ Years of Experience 

Certified Teachers and College Professors

Warm and Friendly Environment

This is a placeholder for the Yext Knolwedge Tags. This message will not appear on the live site, but only within the editor. The Yext Knowledge Tags are successfully installed and will be added to the website.

Hours:

This is a placeholder for the Yext Knolwedge Tags. This message will not appear on the live site, but only within the editor. The Yext Knowledge Tags are successfully installed and will be added to the website.

Take A Virtual Ride With HwH Through Zoom!

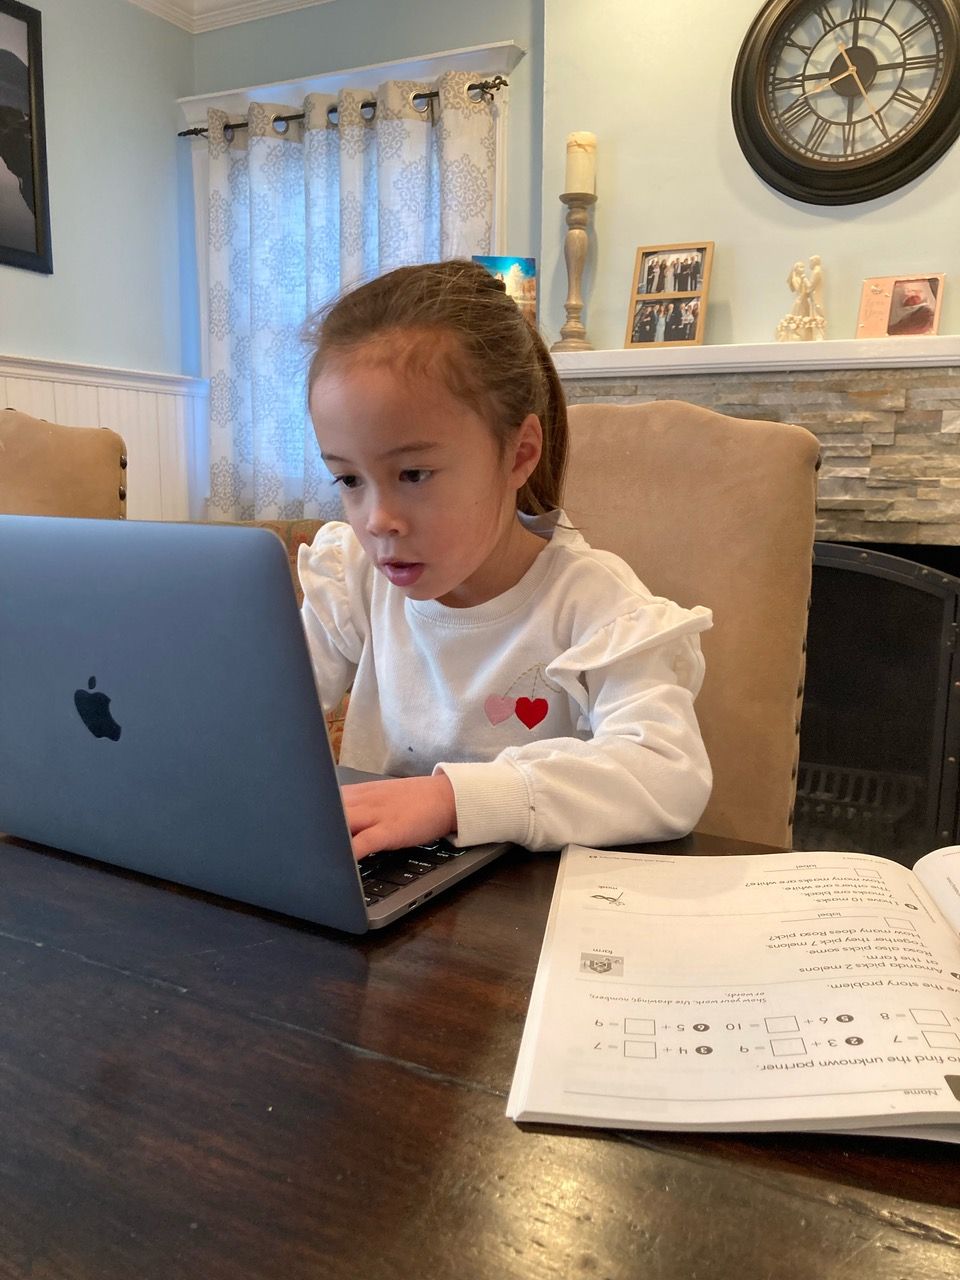
Zoom is a high-quality video conferencing platform that allows tutors and students to work simultaneously through a digital whiteboard where they can write, type, and even draw. Teachers and students will be able to share their screen, enabling them to teach interactive lessons, review school assignments, assist with homework, and help students prepare for exams. In addition, they will be able to save images from the whiteboard and record all sessions for later viewing.


Online tutoring is perfect for students or teachers who are unable to come into the office or go to the home due to illness, distance, or any other reason.


Call or text Homework Hub today to register for both our in-person and online classes. CALL 631-673-7250 or TEXT 516-423-2543.


HwH Tips To Help Students Learn Best Online

In order to maximize your child's learning experience during class, please follow the directions below:


1. Please email Homework Hub, as soon as possible with any specific work needed to be reviewed during the session.


2. If a teacher requests work to be printed, please have this done before class starts and make sure your child is prepared with all other needed materials such as a calculator, pencil, ruler, etc.


3. Have your child log onto our classes via a laptop or desktop. Smart phones and tablets can be exceedingly difficult due to their capabilities and small size.


4. It is important that your child joins our Zoom classes on time. This way we get a chance to say "hello" and get right to work!


5. Please help your child to focus as best as possible on his/her class and limit all distractions in the room - cellphones, TV, pets, siblings, games, etc. 


6. Please remind your child that cameras need to be on and not to use a virtual background.


7. Have your child sit at a desk or a table where he/she will be able to focus best. Students should not be lying on a sofa or in bed during lessons; it is not conducive for an optimal learning environment.

Zoom Videoconferencing Features

Teachers

  • Inviting Students to Your Session

    • When logged into Zoom, click on the blue writing at the top right corner of your screen that reads “Host a Meeting.”
    • You will see different options (Video On, Video Off, Screen Share Only) - Select the option you would like.
    • Zoom will download on your computer.
    • You will then be able to invite your students via email or contacts. They will receive a link in their email inbox.
  • Sharing Your Screen With Students

    • Once the session has been created, select “Share Screen” in the lower middle section of your screen.
    • It will give you options such as sharing full desktop, whiteboard, etc.
    • To share computer sound, click the check box for “Share Computer Sound.”
    • Then, click “Share Screen.”
    • Once you have completed your session, hit the red button on the top of your screen in the middle that reads “Stop Share.” To end your session, click "End Meeting" in the lower right-hand corner of your screen.
  • Muting Participants

    • Select “Manage Participants.”
    • Click “Mute All.”
    • You will be prompted to allow students to unmute themselves if they wish to speak/have a question for you - choose the option you’d like.
    • Click “Continue” once you are done choosing your option. If you wish to give cursor control to a student, select “Remote Control” in the black section at the top of your session. You will then see “Give Mouse/Keyboard Control to ______”
  • Uploading Documents

    • Be sure to verify that your file transfer setting is on.
    • To do this, click on Account Management, then click on Account Settings.
    • Go to “File Transfer” option on “Meeting” tab and make sure the setting is enabled. If not, click the status toggle to turn it on.

    You can send files in chats too.

    • Click on “Chat.”
    • Select “More.”
    • Select “Share file in meeting” to send the file.
    • Students will see a notice when the file is sent and will be given the option to download the file.
  • Recording Session

    • This feature allows you to record and save your screen/session.
    • To record, click on “More” in the black section at the top of your session.
    • Select the “Record on this computer” option.
  • Scheduling a Meeting

    • Go to zoom.us/meeting
    • Click on the “My Meetings” tab on the left side of your screen.
    • Click the blue button that reads “Schedule a Meeting.”
    • Select topic, date/time, duration of the scheduled meeting, host video on/off, participant’s video on/off, mute participants upon entry.
    • You can copy and paste invitations manually to send too.

Students

  • Receiving Invitation to Teacher’s Session

    • You will receive an email to be invited into the zoom meeting.
    • Click on the link that follows the words “Join Zoom Meeting."
    • You will then be prompted to download Zoom on your computer. It will give you a prompt to launch on your computer.
    • If your teacher has not yet started the meeting, you will see “Please wait for the host to start this meeting.”
    • Once your session starts, click Join Audio Conference by Computer.
    • If your teacher allows you to use your webcam as well, select the button on the lower left that says “Start Video.”

Teachers and Students

  • Messaging

    • To start a chat, click on “Chat” in the lower middle black section of your screen next to “Share Screen.”
    • Teachers, you can chat with all students or chat privately. Go to the blue button in your chat that reads “Everyone” with an arrow (this will be a chat sent to all students in your session). If you would like to chat separately, click on the blue button - there will be a drop-down menu. You can then select a particular student.
    • The chat section will be located on the right-hand side of your screen.
    • If you want the chat to stay open, click on the little down arrow at the top of your chatbox.
    • Click “Pop-out” - you will then be able to slide your chat box around your screen/move it to the side of your screen.
    • In your chatbox, you will be able to type what you want to say.
    • To send a file in your chat, click on “More” > “Send file”, then click “Continue.”
  • Raise Hand Feature

    • The raise hand feature allows students to “raise their hand” to indicate if they need help from the teacher.
    • Students, if you need help, click “Raise Hand” in the “Webinar Controls.”
    • Teachers will be notified when a student has raised hand.
    • You can click “Lower Hand” if the question has been answered.
    • Teachers, you can lower a hand by clicking “Participants” in “Meeting” controls - then click “Attendees” tab.
    • Teachers, you can also unmute students by hovering over participants with hands raised and click “Allow to talk.”

  • Using Annotation Tools/Drawing on Screen

    Before using annotation, make sure it is enabled in your account.

    Go to the “Navigation Panel.”

    Click “Account Management.”

    Click “Account Settings.”

    Click “Meeting” tab.

    Under “Meeting (basic)", verify annotation is enabled. If not, click the status toggle to turn it on.

    After sharing your screen/whiteboard, annotation controls will display. If you do not see annotation tools, click “Annotate” if you are sharing your screen OR “Whiteboard” if you are sharing whiteboard.

    Click “View Options.”

    Click “Annotate” at the top.

    If you want to enable students to be able to annotate on your shared screen as well, click “More” in the screen share controls.

    You can “Allow/disable” participants' annotation.

To connect teachers and students through Zoom:


CALL 631-673-7250 

TEXT 516-423-2543


Classes are continuously forming.


Online registration is not available for all classes. Many of our classes are grouped by academic level. If you don't see the class that you are looking for, please contact Homework Hub directly to discuss your child's individual needs.

Contact Us

Sign up to stay in touch!

By submitting this form, you are granting: Homework Hub™, 628 Walt Whitman Road, MELVILLE, New York, 11747, United States, http://hwh@homeworkhub.org permission to email you. You may unsubscribe via the link found at the bottom of every email. (See our Email Privacy Policy for details.) Emails are serviced by Constant Contact.

Learn More About

Homework Hub

Play Video

Ready to Get Started?

Text us at (516) 423-2543

Share by: